Sunday, January 16, 2011

New Kitchen Appliances

Thought I would share some of my newest kitchen stuff I've gotten recently!

I received this for a Christmas present this year-love the red color! It's the mini version of the original so you have to fill up the water every time you use it, which is totally fine with me! I bought the little stand soon after and filled it mostly with iced tea, hot tea, hot chocolate and of course some coffee. So far, I'm loving it!


I bought this for myself after Christmas and I love love love it! I only used the immersion blender part of it just once but I use the chopper part quite often. I'm sure I'll start using the immersion part more as I get used to it. But I highly recommend buying one if you don't already own one!


My substitute for a KitchenAid mixer. I bought it on clearance at Target for $24.99. It so does not work as well as an actual stand mixer. In fact, it kind of sucks! I used it to make my peanut butter cheesecake. It doesn't mix up around the bowl well at all-I had to keep turning the bowl and use a spatula to make sure it mixed. And towards the end, when I got tired of rotating the bowl, I just took off the mixer and used it as a hand mixer. But as often as I bake, it will have to do until I can actually afford the real thing.

Tuesday, January 11, 2011

Chocolate Covered Peanut Butter Cheesecake Pops


The above picture is what this dessert was supposed to look like...mine didn't turn out so pretty! But they still tasted good! I found this recipe on www.foodnetwork.com while looking for a new dessert recipe for our annual girls' Thanksgiving/Holiday dinner. It looked and sounded good and it did taste good and I did get good reviews from the girls. But it was a little more difficult to make and I think the next time I make it, instead of putting it in the fridge overnight, I will freeze it so when I cut it, it won't fall apart on me and fall off the sticks. The cheesecake was so soft, I ended up taking out the sticks and drizzling chocolate over it. It worked. Oh and next time, I'll be more careful and not cut my finger open with the scissors while cutting the sticks in half!

Ingredients:

1 1/2 cups dark brown sugar
1 1/2 lb cream cheese, at room temp.
1/2 cup heavy cream
2 large egg yolks
1 tbsp pure vanilla extract
1 3/4 cup creamy peanut butter

Chocolate:

5 tbsp veggie shortening
12 oz semisweet or bittersweet chocolate chips (I used Ghiradelli chocolate chips)

Wooden pop sticks (I used cheap wooden skewers that I cut int half)

For the cheesecake: Position rack in the middle of the oven and preheat to 325 degrees. Line a 8-in by 8-in baking dish with foil letting long flaps overlap on each side. Spray foil with nonstick cooking spray.

Break up the brown sugar to remove all lumps. In a standing mixer with the paddle attachment, beat the cream cheese and sugar on medium speed until smooth. Add the cream and beat slowly; then add the yolks and vanilla mixing until just combined. Gently stir in peanut butter. Make sure not to over beat the mixture otherwise it can cause the cheesecake to crack.

Pour and evenly spread the batter in the prepared pan. Bake for 15 minutes. Open the oven to release some heat, then lower the temperature to 200 degrees. Continue to bake the cheesecake until the outside is set but the center is still loose, for about 45 minutes. Turn off the oven, and cool cheesecake in the oven for 45 more minutes. Cover and refrigerate at least 8 hours or overnight.

Lift cheesecake from the pan by lifting up the foil. Transfer to a cutting board. Cut into 1 1/2-inch cubes. Stick a wooden pop stick halfway into each bar and freeze for 1 hour.

Meanwhile, place shortening and chocolate chips in a microwave safe bowl and heat the chocolate at small intervals, mixing well in between.

Dip the cheesecakes into the chocolate mixture, and stand on waxed paper to set, about 5 minutes. At this point, I put them in the freezer to set more quickly. Serve cold (straight from the fridge), or freeze up to 2 weeks. (Left out, the cheesecake tends to melt a little.)


Adding the cream...


Mixing up the ingredients...
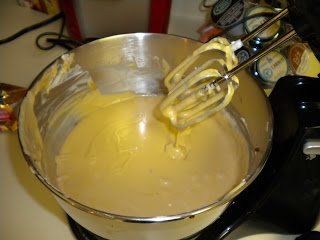


After the peanut butter was added...


Cutting up the cheesecake...


Cheesecake with the sticks in before dipped in chocolate...


Finished product, minus the sticks...Enjoy!

Thursday, January 6, 2011

Sweet Potato Balls

I was watching the Food Network one night before Thanksgiving and Paula Deen was on. I wasn't really paying too much attention to the show until they started talking about sweet potato balls. Sounds interesting right? I thought so too, so I started really listening. It looked pretty easy to make so I decided to try them for our Christmas dinner at the cabin this year. They turned out pretty well and it makes a perfect single serving. It also lets your guest or family member choose what they want on their serving so everyone is happy!

A couple side notes...the recipe calls for orange juice and orange zest. My mom used canned sweet potatoes, which are a little more moist than regular baking sweet potatoes. If I were to use the canned again, I wouldn't add the orange juice. The sweet potatoes were a little too moist and starting to melt. I also wasn't a big fan of the strong orange juice taste with the sweet potatoes. So next time, I'll omit the juice but keep the zest for a little added flavor.

Since there was only 3 of us, we just made 6 balls, which is the perfect amount for 1 can of sweet potatoes.

Ingredients:

4 lg sweet potatoes (or 1 can sweet potatoes)
2/3 cup brown sugar
2 tbsp orange juice
1 tsp orange zest
1/2 tsp freshly grated nutmeg
1 large marshmallow per ball
Toppings such as coconut, crushed nuts, brown sugar, crushed fruit, etc

If you are using baking potatoes, bake until tender, then peel and mash them. Stir in brown sugar, orange juice, zest and nutmeg. Press mashed potatoes around each marshmallow, creating a 2-3 inch diameter ball.

Roll balls in topping mixture of your choice and place on a pan covered in tin foil. Bake 15-20 minutes, watching carefully for the last few minutes or cooking (the expanding marshmallows can cause the potato balls to burst open). Let cool slightly and serve.


Canned sweet potatoes...


Freshly ground nutmeg...


Fresh orange juice...


Ready to be rolled...


Marshmallows...the recipe called for giant marshmallows and we couldn't find any so we used the regular ones. And the balls turned out to be a decent size, so it worked.


Rolled up around the marshmallow...


The three toppings we used...brown sugar and sugar, coconut and crushed pecans..


All rolled up and ready to be baked. We had to put the two brown sugared balls into muffin cups as they began to melt before we could get them into the oven. They seemed to have worked just fine.


Fresh from the oven...


Enjoy!

Peanut Butter Blossoms

For as long as I can remember, my mom has always made these cookies for Christmas. Either to hand out to her daycare parents or just for us to snack on. Needless to say, these are my favorite so every year, we still continue to make them. And since she no longer does daycare, my mom sends home lots of cookies with me!

Ingredients:

3/4 cup sugar
3/4 cup brown sugar
1 1/2 sticks unsalted butter
3/4 cup peanut butter
2 eggs
1 3/4 cup flour
2 tsp baking soda
1/4 tsp salt
Hershey Kisses

Preheat oven to 350. Mix dry ingredients and set aside.

Mix sugars, butter and eggs, beating until fluffy. Gradually add dry ingredients with wet dough. The dough should be stiff (you may need to add more flour to make it stiff if the dough is not stiff enough to handle). Make into 1-in balls, roll in sugar and place on a greased pan.

Bake for 10 minutes or until cracks appear. Remove from oven. Press Hershey Kisses into center of each cookie. Return to oven and bake 3-5 minutes longer.


Unwrapping all the Hershey Kisses...


All rolled up and ready to be baked!


Right before they went back into the oven for the last time...


The recipe made lots and lots of cookies! Mine are in the freezer since I can't possibly eat them all before they go bad! Enjoy!

Ham Pickle Roll-Ups

I was introduced to these wonderful appetizers at my old job, where several of my coworkers were obsessed with them! I've also had them at Psycho Suzi's and they were of course awesome there. They are a bit of a pain to make but they are so worth the work!

Ingredients:

Jar of firm pickles (I used Gedney)
8 oz. softened cream cheese
Deli Ham

Since the ham can easily tear while spreading on the cream cheese, it's best if you dry out the ham. When I did it, I place four slices of ham on a paper towel and used another paper towel to blot out the excess juices. Then I heated the cream cheese up a little bit in the microwave so it was extra soft. Carefully spread some cream cheese onto each slice of ham. Place a pickle on each slice and roll up. Immediately wrap in plastic wrap. Chill the wrapped roll-ups for at least an hour or overnight. When ready to serve, unwrap the rolls and slice them, carefully.

Mine were a little messy but I think I used ham that was too thin. Next time, I'll use a thicker cut of ham. I brought these to my family's xmas party and they were gone super quick! A success! Enjoy!


Ready to be rolled...


Carefully rolled up...


Rolled up and ready to sit in the refrigerator to be chilled.


All sliced and ready to go!

Buffalo Chicken Dip

I received this recipe from my boss at work, who made it for a potluck for one of our staff meetings. It makes a lot and it is super spicy but it was really good. So I decided to make it for my family xmas party. And it seemed to be a hit..I had left overs but it wasn't that much. It can easily be halved, which I may do next time.

Ingredients:

16 oz Ranch dressing
1 bottle hot sauce (12 oz.)
2 8 oz. cream cheese, softened
3 cups Mozzarella cheese, divided
5 cups shredded cooked chicken.

Heat ranch dressing, hot sauce, cream cheese and 1 cup Mozzarella cheese in a saucepan. Make sure the cream cheese is really soft, otherwise, it can take a while to melt down-I was in a bit of a hurry when I made mine, so there were some chunks.

At this point, you can either place all the ingredients, including the chicken, into an oven safe dish or place it in a slow cooker, which is what I did. Top with the 2 cups of Mozzarella cheese and heat until melted.

Serve with taco chips or bread. Enjoy!

Friday, December 10, 2010

Yummy Food!


Sorry for the weird angle of the picture...my computer likes to flip things around every so often! I hosted book club at my apartment this past weekend and made lots of yummy recipes. Of course I took a picture of everything I made...doesn't it all look sooo good?! My friend brought the hummus and the ginger cookies but I made the rest..except for the grapes of course! :) The recipes of everything follows this blog...